Reviving an iPod Classic: Overloaded with Mods
After I started to revive my blog, I remembered many of the small projects I had started. Some of them are close to completion. But as we all know, it always takes the longest to finish.
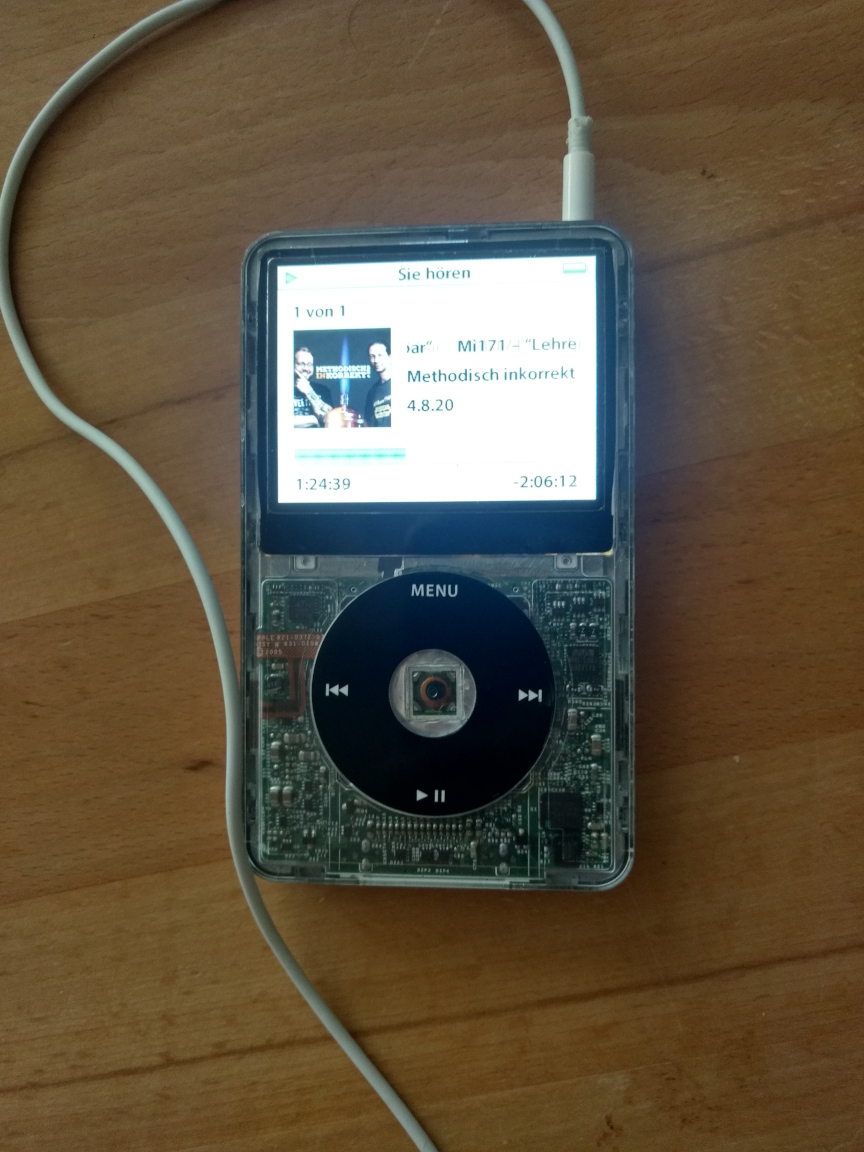
One of these projects was a modified iPod Classic. Even today, the iPod is still a good piece of hardware. Back when it was launched, the devices were reserved for people who wanted to spend a little more money. As a teenager, I couldn’t afford it. 15 years later, you can get the devices on eBay and the like for very little money.
There is a relatively good market for hardware due to its widespread use and still great popularity. As the casing of my device already had many signs of age. The first thing I did was to replace the casing cover with a transparent one. The hard disk with 80GB memory still has plenty of space by today’s standards, but the weight and battery life can be improved by using a flash memory (SSD). The battery had also reached the end of its service life and had to be replaced with a new one. These are very common mods and you can find fully converted iPods on eBay. Some dealers ask a relatively high price for them.
There are various solutions for the flash memory mod. Some of the higher priced mods are advertised specifically as iPod mods. The adapter boards for SD cards or SSD cost around €50. The iPod uses an IDE connection in ZIF format and therefore an adapter is necessary in any case, as memory with a ZIF connection is rarely found.
There are generic cheap ZIF to mSata adapters that work well enough. There are a few users who report unstable operation due to the simple voltage regulator. There are well documented modifications for the voltage regulator. As I have not noticed any problems, I have already done nothing. To be able to use Rockbox on an iPod modified in this way, however, Rockbox must be patched.
Headphones with cables are gradually being replaced by Bluetooth headsets. The 3.5mm headphone socket has been removed from many cell phones. My iPod therefore also needs a way of transmitting audio via Bluetooth. Some conversions using ready-made audio Bluetooth transmitters are documented in the forums. The transmitters used were mostly no longer available and in order to pair the headset, at least one additional switch would have to be placed somewhere in the iPod housing. Some also have a built-in reed switch that can only be operated by a magnet.
While searching for a Bluetooth audio transmitter, I came across the KCX Bluetooth Audio Transmitter. The transmitter comes in the form of a circuit board. The advantage, or so I thought, is that there is a UART interface on the iPod connector on the bottom. The UART is originally used for controlling accessories. In my application this may be used to control the Bluetooth module from the iPod via the UART interface. However, this requires that the Bluetooth module needs to under stand the iPod Accessory Protocol used by Apple. Or I have to implement my own protocol on the iPod by using the Rockbox custom firmware. I initially opted for the simpler option of using an additional microcontroller to translate key combinations on the clickwheel. Unfortunately, this solution led to a dead end. The Bluetooth transmitter could not be permanently paired with my headset. After every disconnection, the headset had to be paired again. Different hardware versions of the KCX transmitter could not be persuaded to pair permanently, neither via push button nor via UART.
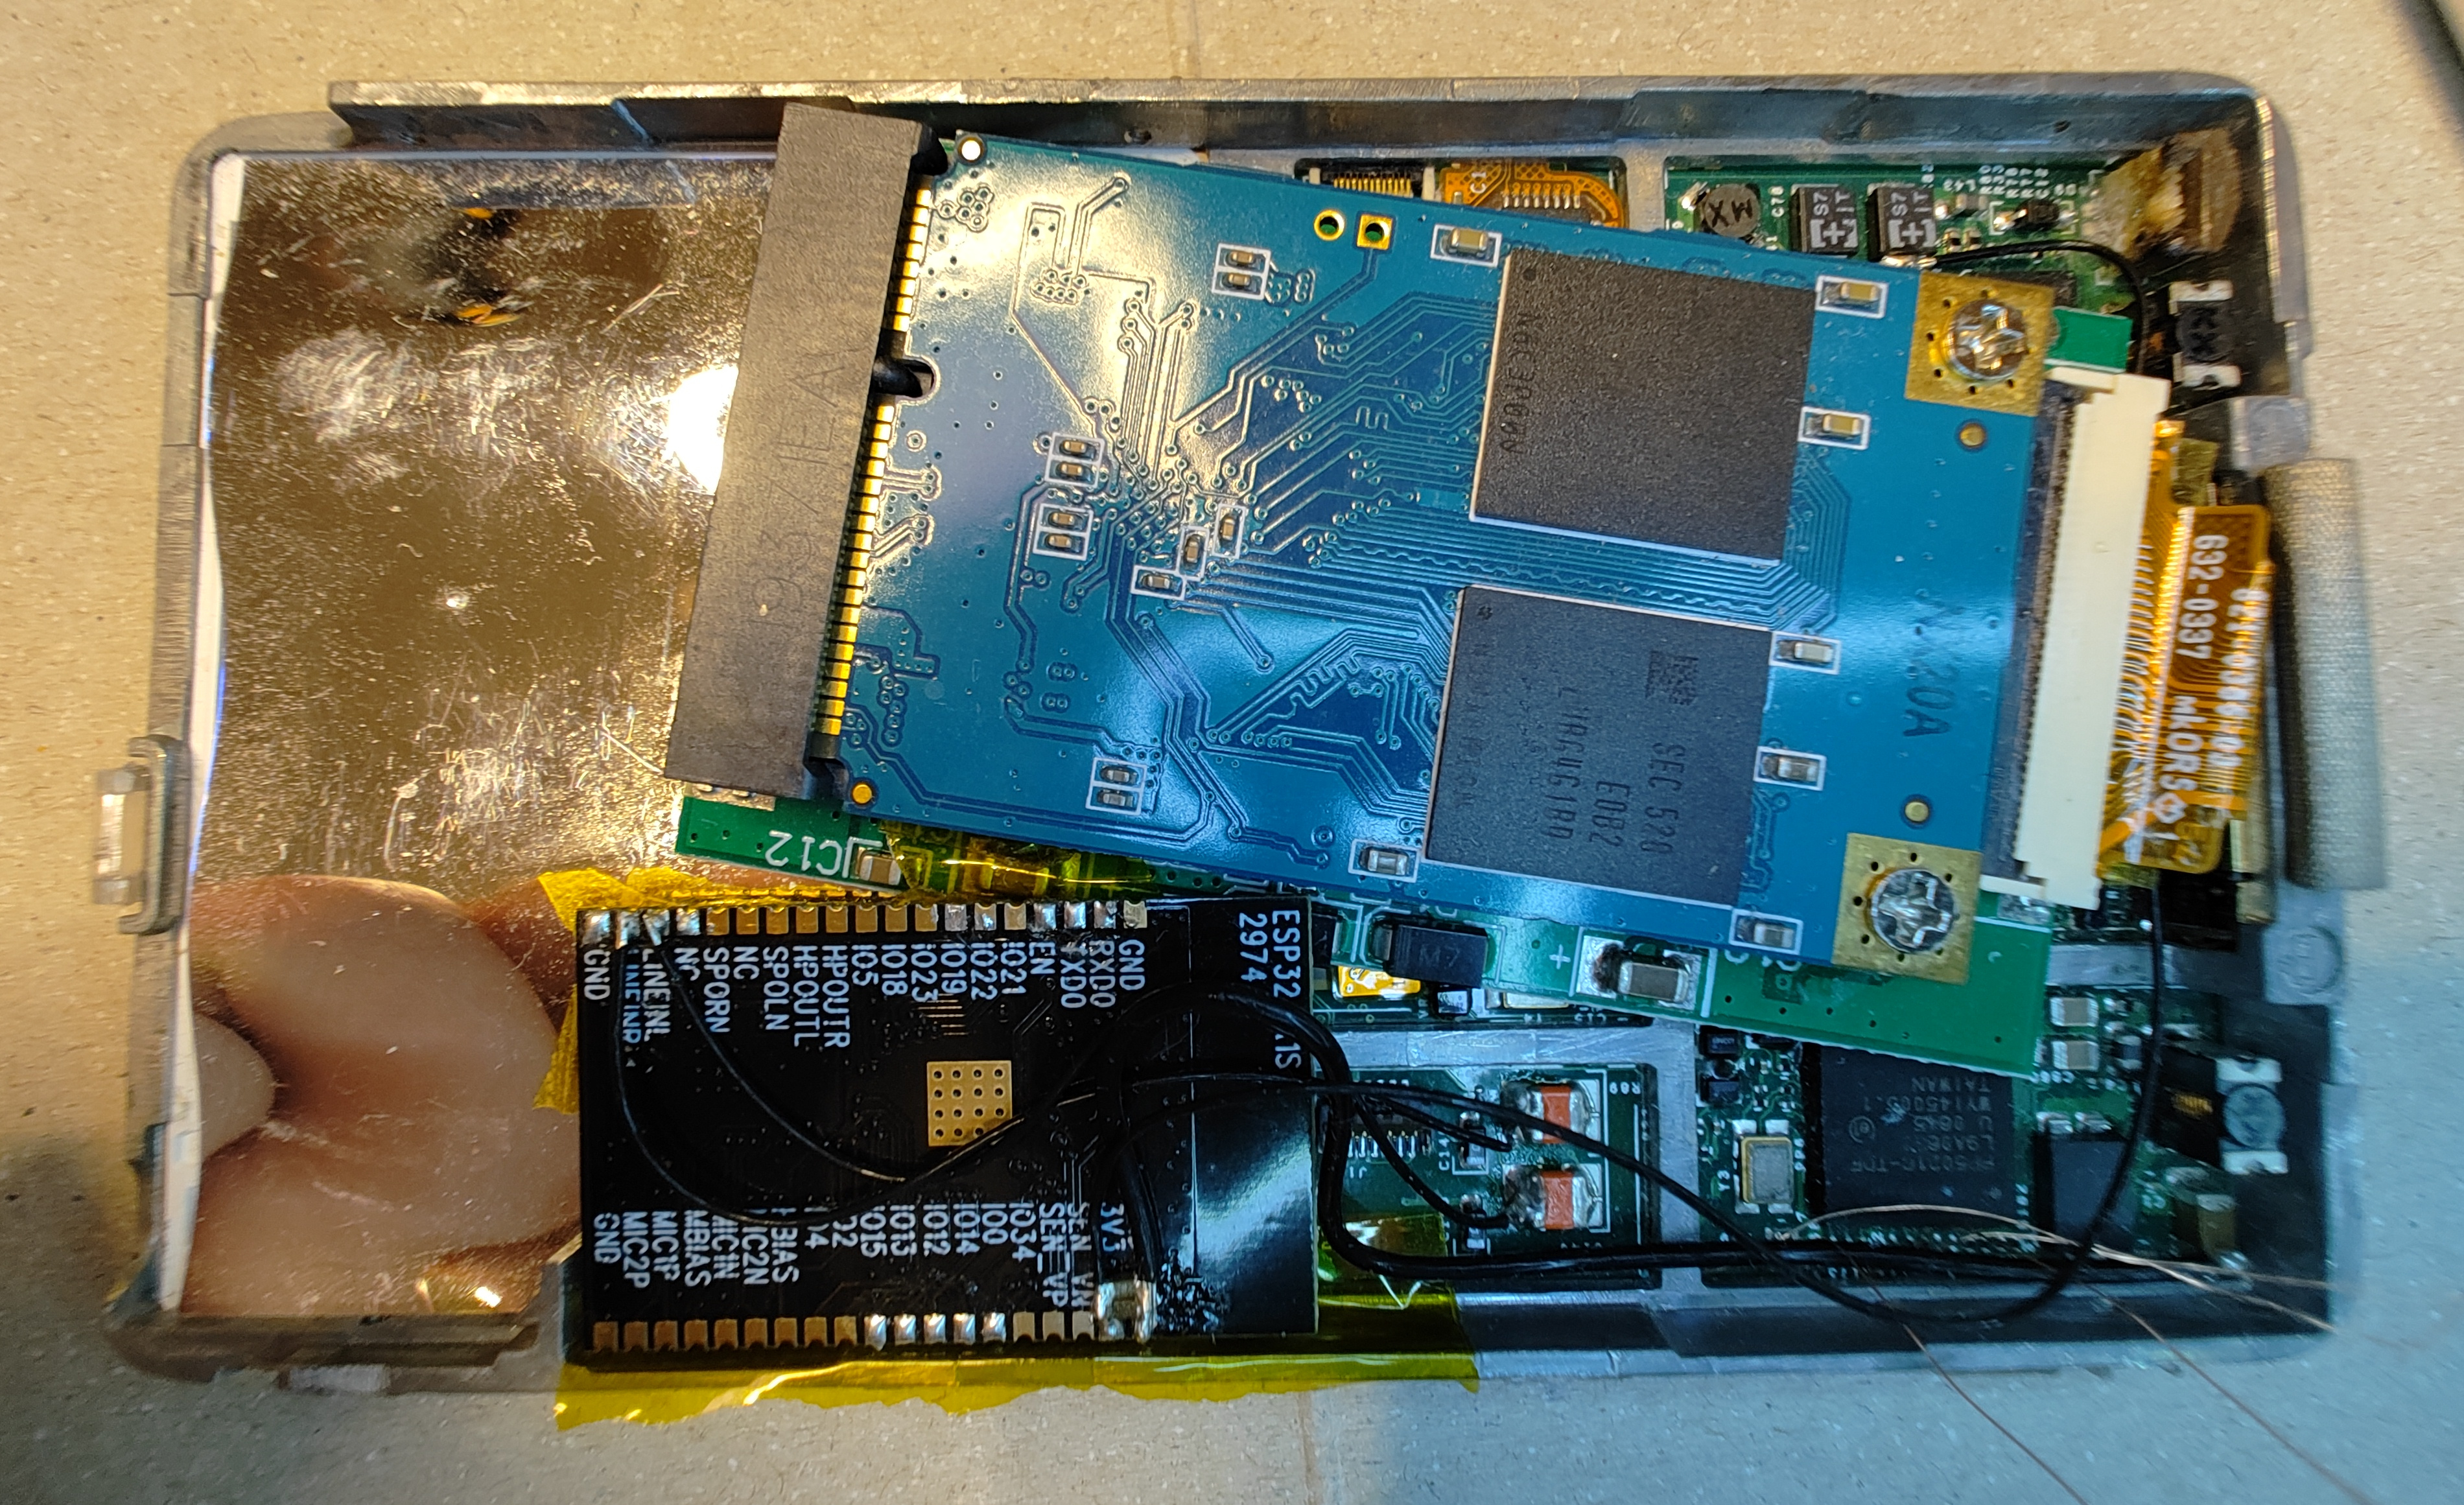
In the end, I decided to use an ESP32 with audio ADC. An audio transmitter can be realized with the help of an ESP32 A2DP arduino library. [Using my custom firmware}(https://github.com/saeugetier/audio_bt_emitter), I have the option of evaluating key combinations from the clickwheel. The Bluetooth transmitter goes into the energy-saving deep sleep mode after a specific time and thus saves the battery. Waking the bluetooth up can be done by pressing the middle and menu button simultaniously and bluetooth pairing sequence is initiated by pressing the play and middle button together. With the help of my own firmware, I was also able to implement the pairing more reliably. The pairing status is indicated by a blue LED as a flashing pattern. It was just a little more difficult to accommodate the esp32 module as it is much larger.
By integrating these modifications, my iPod Classic has been transformed into a versatile and modern device, ready to serve for years to come.